About this shot tracer pro tutorial
In this step-by-step golf instruction/tutorial video, I’ll guide you through the process of correctly using the Shot Tracer PRO desktop app to trace your ball flight and golf swing.
Many YouTube golf stars including Rick Shiels, Erik Anders Lang and Peter Finch to name but a few, make use of Shot Tracer technology or similar applications/methods in their videos to not only help their viewers see where their shots are going but to generally make their videos more engaging.
By the end of this video, you too will have the knowledge and skills to trace your ball flight and golf swing to help spruce up your golf videos for YouTube or other social media channels. Along the way, as well as showing you how to use the app, I’ll also share some of my top tips to help make your life easier when using Shot Tracer PRO.
View video transcript
I understand. You want the entire, non-summarized transcript text broken into paragraphs under headings which are explicitly bolded. I will apply this formatting to the video “Shot Tracer PRO Tutorial: Learn How To Trace Your Ball Flight And Golf Swing” (https://youtu.be/Lr762R8ates).
INTRODUCTION TO SHOT TRACER PRO
If you watch any golf course vlog or review videos on YouTube, such as those by the likes of Rick Shields, Peter Finch, or Eric Anderslam, then you’ll know that you have noticed that they use shot tracing technology to illustrate their ball flight for pretty much every single shot. Not only does it make it a little bit easier to see where the shots are going, but it generally makes watching these videos much more interesting. Unlike the shot tracing you’re probably used to seeing on the PGA, LPGA, DP World, and Live Gold Tour coverage on the TV, which is done automatically using Top Tracer technology, these YouTube content creators add the shot tracing manually using either the Shot Tracer mobile app or the Shot Tracer Pro desktop app.
I’m Andy from Andy’s Golf Blog, and in this video tutorial, I’m going to show you how you can use the Shot Tracer Pro desktop app to achieve a similar outcome for your golf swing videos. As well as taking you through the process of tracing your ball flight, I’ll also demonstrate how you can trace the movement of your club head using the Swing Tracer too. Not only will I explain how to use the Shot Tracer Pro app correctly, but I’ll also share some of my top tips to help you get the most out of it. By the end of this video tutorial, you’ll know exactly how to get your golf shot and swing videos YouTube Ready with the help of Shot Tracer Pro.
The Shot Tracer Pro desktop app can be downloaded on both Mac OS and PC and costs around about $15 per month or $89 per year. Although quite a bit more expensive than the mobile version, which has a one-off cost of around about $6, editing using the desktop app is considerably easier, and unlike the mobile app, it allows you to trace and export 4K video. I’ll be using the Mac OS version of Shot Tracer Pro, but if you’re a Windows user, you’ll still be able to follow along because both versions are exactly the same. Once you’ve paid for it, downloaded, and installed the app onto your computer, you’re ready to begin.
SHOT TRACER: TRACING BALL FLIGHT
Let’s first take a look at how to use the Shot Tracer Pro desktop app to trace your ball flight. I have opened up Shot Tracer Pro here on my Mac. On the right hand side of the interface, you’ll see there are a range of different options. A lot of these are grayed out because we haven’t yet brought in a swing video and analyzed the ball flight or the swing movement. These options are for fine tuning the tracing line or the swing movement lines, so we can’t use these just now. You’ll see there’s one for Shot Tracer, one group of options for Swing Tracer, and a third set for Putt or Ball Tracer. I won’t cover Putt or Ball Tracer in this video. I am going to focus on using Swing Tracer and using Shot Tracer.
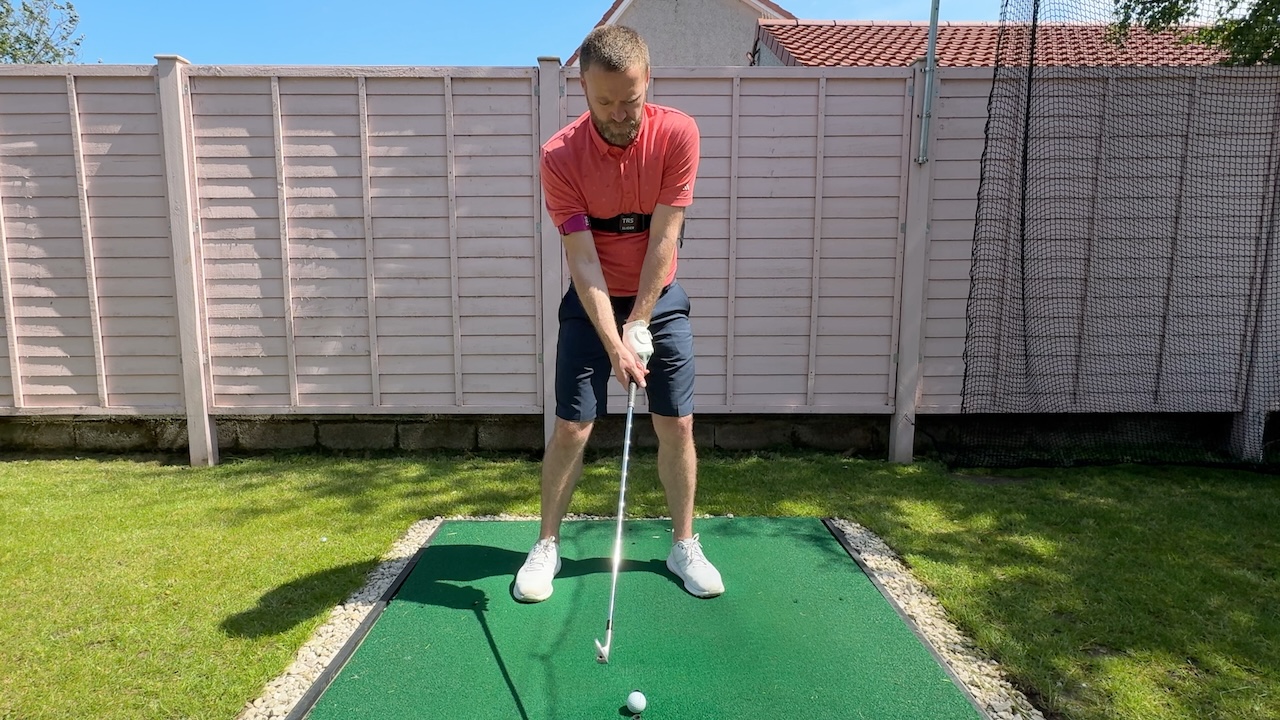
You can import a collection of videos or a single video, or you can import a single video which has multiple different swings in it. I’m going to bring in one swing video, but I’m going to use that to trace my ball flight and to trace my swing movement, just to save a little bit of time, rather than doing it with multiple different clips. To bring in your swing video, you want to click on “Import video” down in the bottom left, and then it will ask you to locate your file. I’m going to use this one here, which is just a standard video taken of me swinging the golf club. I click open, and it will now analyze this video clip and try its best to track the ball flight. When the little thumbnail is colored, it means it has managed to track the ball flight. If it’s grayed out, it means you’ll basically need to do it yourself. Even if it does analyze it, it doesn’t mean it’s necessarily going to be right.
Let’s click on the thumbnail. It has analyzed the ball flight here. If I click play, we notice a couple of things. First of all, the ball is up here, but the flight is different. The second thing to notice is it says the flight time is six seconds. This was a 56 degree wedge, that was definitely not six seconds. Thirdly, it says I’ve hit it 300 yards. I cannot hit my 56 degree wedge 300 yards. We’re going to correct all of those things in a little minute. If it has actually traced the ball flight but it just got the landing point slightly out, you can move this to where the correct landing point should be. However, unless it has traced the ball flight perfectly, I wouldn’t say moving this is of much value at all. I prefer to track it myself so that I can pick the individual points of the ball flight, and I know that is accurate.
This takes a little bit more time, but it’s definitely my recommended method. What you need to do is you need to go up to the settings icon up here and you’re going to use Edit Trajectory. You get two options here: you could either do Key Framing (which is the most accurate) or you can do Line Molding. Line Molding allows you to basically pick the start point, endpoint, and move a couple of different points on the line around to generally trace the shape of the ball flight. I would say that this one’s best used when you can only kind of just see the ball but you know roughly where it’s going. Line Molding is a little bit too fiddly, and I personally don’t like that one.
What I prefer to do is to go into settings, Edit Trajectory, and instead of using Line Molding, I’m going to show you Key Framing, which is by far and away much more accurate. We’ll click on Key Framing. I’m going to go to reset to set impact frame, and now we’re at the impact frame here. I’m going to click on Set Impact Frame. This is where this tool is much, much better. First of all, you want to click on Auto Skip if it isn’t already ticked, because every time you click on the ball, it will move to the next frame. The next thing I want to do is I’m going to use Zoom In, and now you can move the bar on the right hand side vertically and the horizontal bar down until you can see the ball.
I’m going to click on the ball, and you’ll see a pink or purple cross appear. I’m going to scroll up and find the ball again, and because we have clicked Auto Skip, it automatically moves to the next frame. I’m going to click on the ball, and I’m just going to repeat this process at every point where I can see the ball. It’s a little bit more time consuming, however, it means that we’re being a lot more accurate than trying to move those lines. You don’t need to go all the way with this; actually, it comes to a point where it can get quite hard to see the ball. If you left click and hold, all of the other previous points disappear temporarily, and they allow you to focus in on the golf ball. You can follow the golf ball all the way down if you can keep seeing it.
I’ve reached this point where I can’t see the ball anymore, so what I’m going to do is I’m going to follow this trajectory down and I’m going to assume that it’s probably landed around about here. I’m going to go down to the bottom corner where it says Continue to set Landing point, and then I’m going to click where the landing point is. I’m going to zoom in and place the marker. Now I’m going to click on Create Line, and you’ll see it creates the ball flight. When I click play, you’ll see that the ball is traced much, much better, and because we were clicking along with the descent, it has adjusted the flight time to 3.7 seconds instead of six seconds like it was previously.
CUSTOMIZING THE TRACER LINE
Now that we’ve done all of this, let’s start looking at how we can customize the Tracer line. If you did want to just turn it off, you can uncheck it. Next, let’s look at the Tracer Type. You get 3D, Pointy 3D (which just puts points at the front at the bottom and at the end), 2D, or you can also do things like Dots or Circles. Personally, I always just use 3D. When it says Tracer Effect, you can set it to Fade Out (based on the duration in the “Hide Tracer After” area), Fly Out During Flight (the line flies out from the ball position), or Fly Out After Landing (a popular effect).
Tracer Start Size is basically the size of the point here, and the End Size is the size at the landing point. You can set them to anything you want. Your Tracer Color doesn’t need to be red; you can move around and change it to green, blue, black, or whatever you like. You can also put in your own hex values or RGB values. Casted Shadow is a little shadow of your shot shape; you can turn that off. There is an option to Darken Line on Descent or Fade the Start/End.
A couple of other things to highlight: I tend to leave Lock Peak Shift locked. In Hide Tracer, if the flight time is not quite right, you can increase this or decrease it, but you will notice it is changing the end point there. You can also add Outlines to the Tracer. Apex displays the peak point; I always turn this one off because it’s really hard to work out what the actual apex is in terms of feet or meters as amateurs. Show Distance is always on by default. If I know the distance was only, say, 65 yards, I could enter 65 as the value, and it converts it to meters (59 meters) and back. That is how you can bring in a video into Shot Tracer Pro and how you can trace your ball flight using either the auto tracing or using the keyframe.
EXPORTING SHOT TRACER VIDEO
If we were happy with this and we want to just go as it is, then we can export it. You’ll see at the top here it says Output Resolution. You can keep it the same as the source (if you brought in a 4K file, you can export in 4K), 1080 full HD, or 720 HD. Export As says “entire video from start to end,” which is the full clip, or you can say “trim individual shot sequence,” which will stop once the trajectory line has finished drawing in. I always just do the entire video. You might want to reduce the Tracer duration to one second. Once you’re happy, click Export All Shots (or selected/current shot) and choose the location to save the MP4 file.
SWING TRACER: TRACING CLUB HEAD MOVEMENT
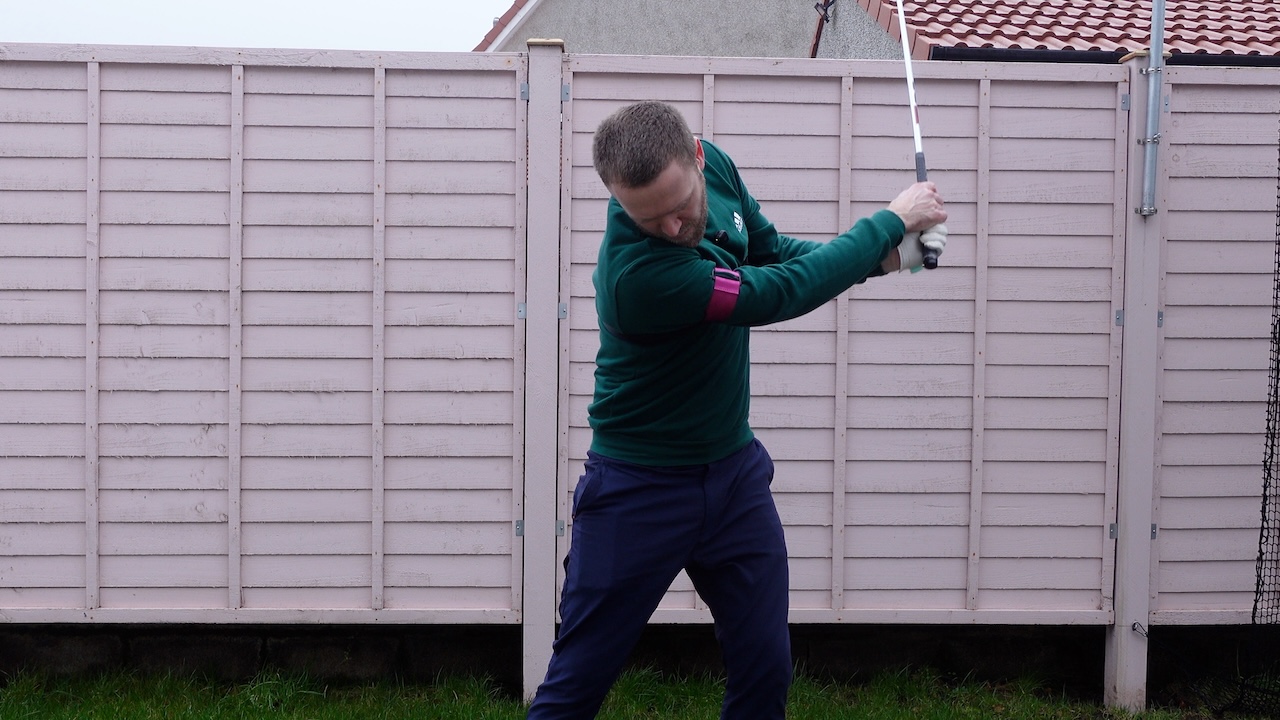
Now that we have had a look at how to trace the ball flight, let’s take a look at how you can trace the golf swing. This is going to be the movement of the club head around my body. I’m going to bring in another video file to work on the swing. It will analyze it for ball flight, which I’m not interested in, so I’m going to just turn Shot Tracer off with this one. Let’s take a look at how we can trace our swing. Swing Tracer is an option on the right hand side. Click on Swing Tracer.
It takes me into the Swing Tracer editor, and it’s going to ask me to choose my first frame. I’m going to click on Set First Frame. Now I’m going to make sure that Auto Skip is on, and I’m going to click on Zoom In. Just like before, I’m going to click and keep clicking on the head of the golf club as it swings backwards. I’m going to do the downswing as well, but I’m going to basically stop at impact. This one’s a lot quicker than doing the ball flight because there aren’t as many frames to have to worry about. I’m now back at impact, and then I click on Create Swing.
CUSTOMIZING SWING TRACER AND FINAL EXPORT
What you’ll see is it has created a tracer for my swing. Yellow is the downswing, and red is the backswing. You can see looking at this, I do have a slightly over the top swing. First of all, for Animation, it says “Normal Line.” You can hide it during your swing or you can hide it after your swing. I think personally the Swing Tracer actually works better in a slow motion swing. You can change the Thickness; I think they look quite good when they’re around about 25 or so, just nice and thin. You can customize your Backswing Color and your Downswing Color. You can also adjust Fade In and Fade Out and increase the duration so that after you finish your swing, those lines stay there for a little minute. When it comes to exporting, because I’ve now got two clips, if I use “Export All,” it’s going to export everything. We just want the selected one, so I’m just going to go where it says Export Selected Shots, and then you’ll see you can choose how many you want to do or you can just leave it as “Current,” and then you just click open.
There you have it, a detailed but hopefully useful deep dive into how to trace your ball flight and your swing properly using the Shot Tracer Pro desktop app.
About Shot Tracer PRO
Shot Tracer PRO is available on both Windows and MacOS operating systems and can be purchased for $14.99 per month or $89.99 per year. Whilst it does cost substantially more than the mobile app (which is available for a one-off fee of $4.99), Shot Tracer PRO allows you to upload, edit and export 4K videos and is generally much, much easier and less fiddly to use.